Making a Supermicro 1U Server quiet
This is a small guide on how to make a 1U server quiet.
I found a cheap Supermicro Server (Thomas Krenn Server) on willhaben.at (similar to craigslist) with a Intel(R) Xeon(R) CPU E3-1220 v6 @ 3.00GHz installed. Since it will be standing in my office I want it to be as quiet as possible. This is quiet a challenge with 1U servers.
Ordering Parts
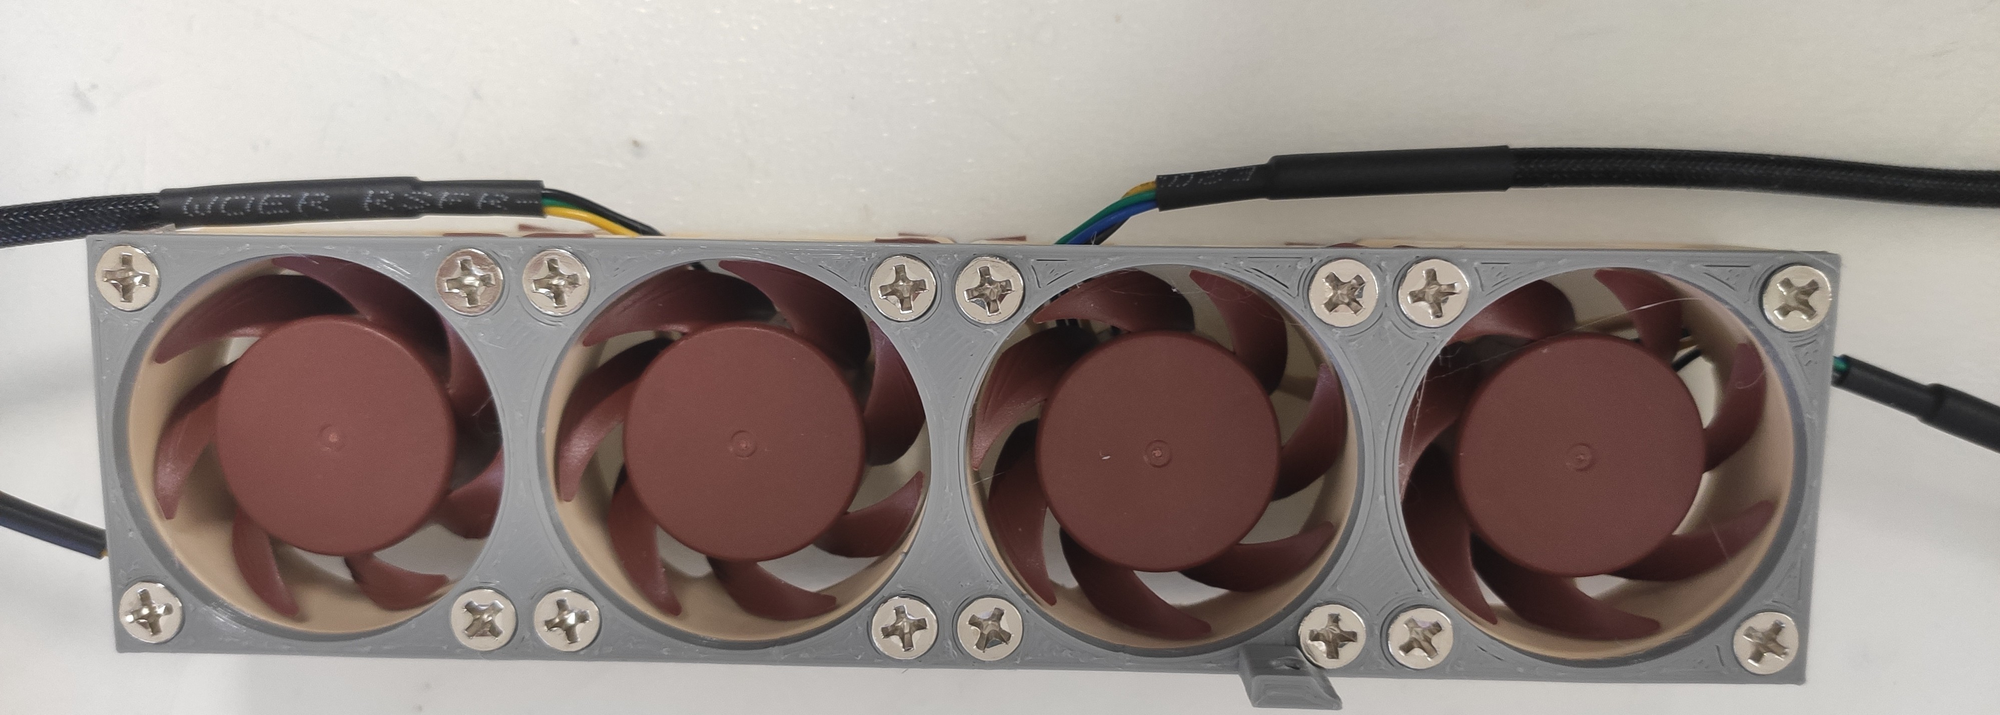
Since the loudest elements of the server are the fans, we will need quiet ones. I decided to buy four Noctua NF-A4x20PWM and one NF-A4x20 FLX. Four of the PWM version to cool the CPU and RAM and the rest to cool the PSU.
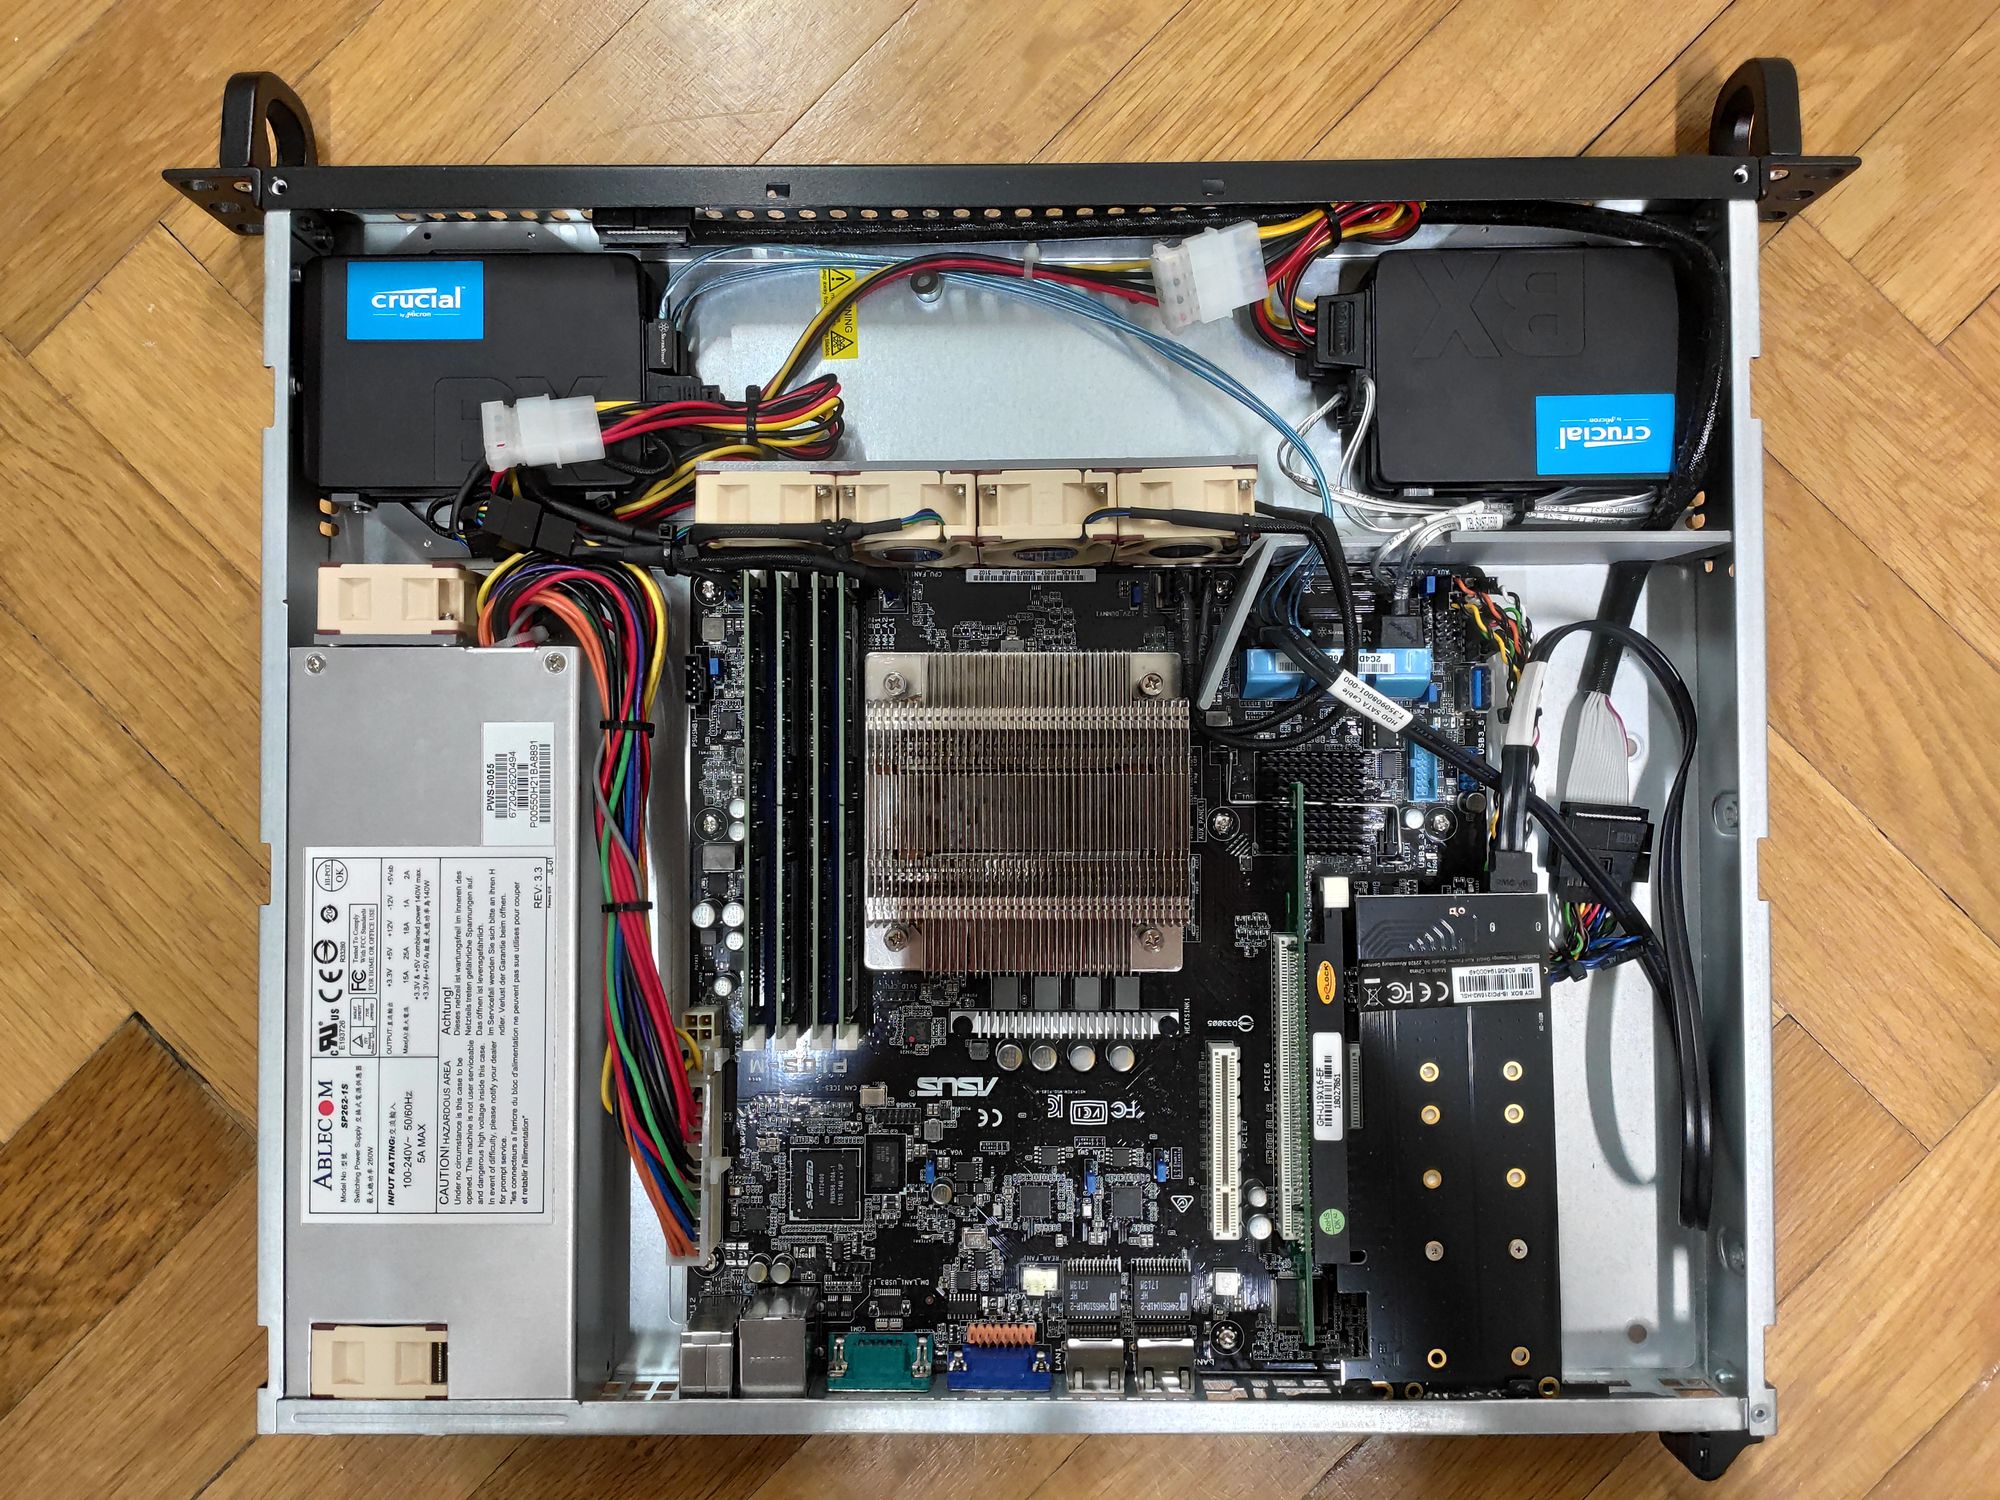
Furthermore there were no drives in the server. I found some “cheap” 2TB SSDs on the Amazon Marktplace and bought four of them. Later on I will set-up a RAID-Z2 between the SSDs. For the boot drives we will use one cheap M.2 SATA drive 128G and one M.2 NVME drive 128G (default boot drive) and run them in mirror mode. Those can be bought cheap on ebay or new. To connect the M.2 drives an angled PCIe riser and a PCIe x4 to M.2 adaptar card are needed.
For FreeNAS it is also important to use as much RAM as possible. It is usually recommended to use ECC RAM, since ZFS highly benefits from ECC. In this case we are using two Kingston 16 GB DDR4 UDIMMs and the two 4 GB DDR4 UDIMMs that where preinstalled.
Last but not least we need some M3 and #6-32 UNC screws to put everything together as well as three slim SATA-cables and one MOLEX to 2x SATA cable.
Airflow and Fans
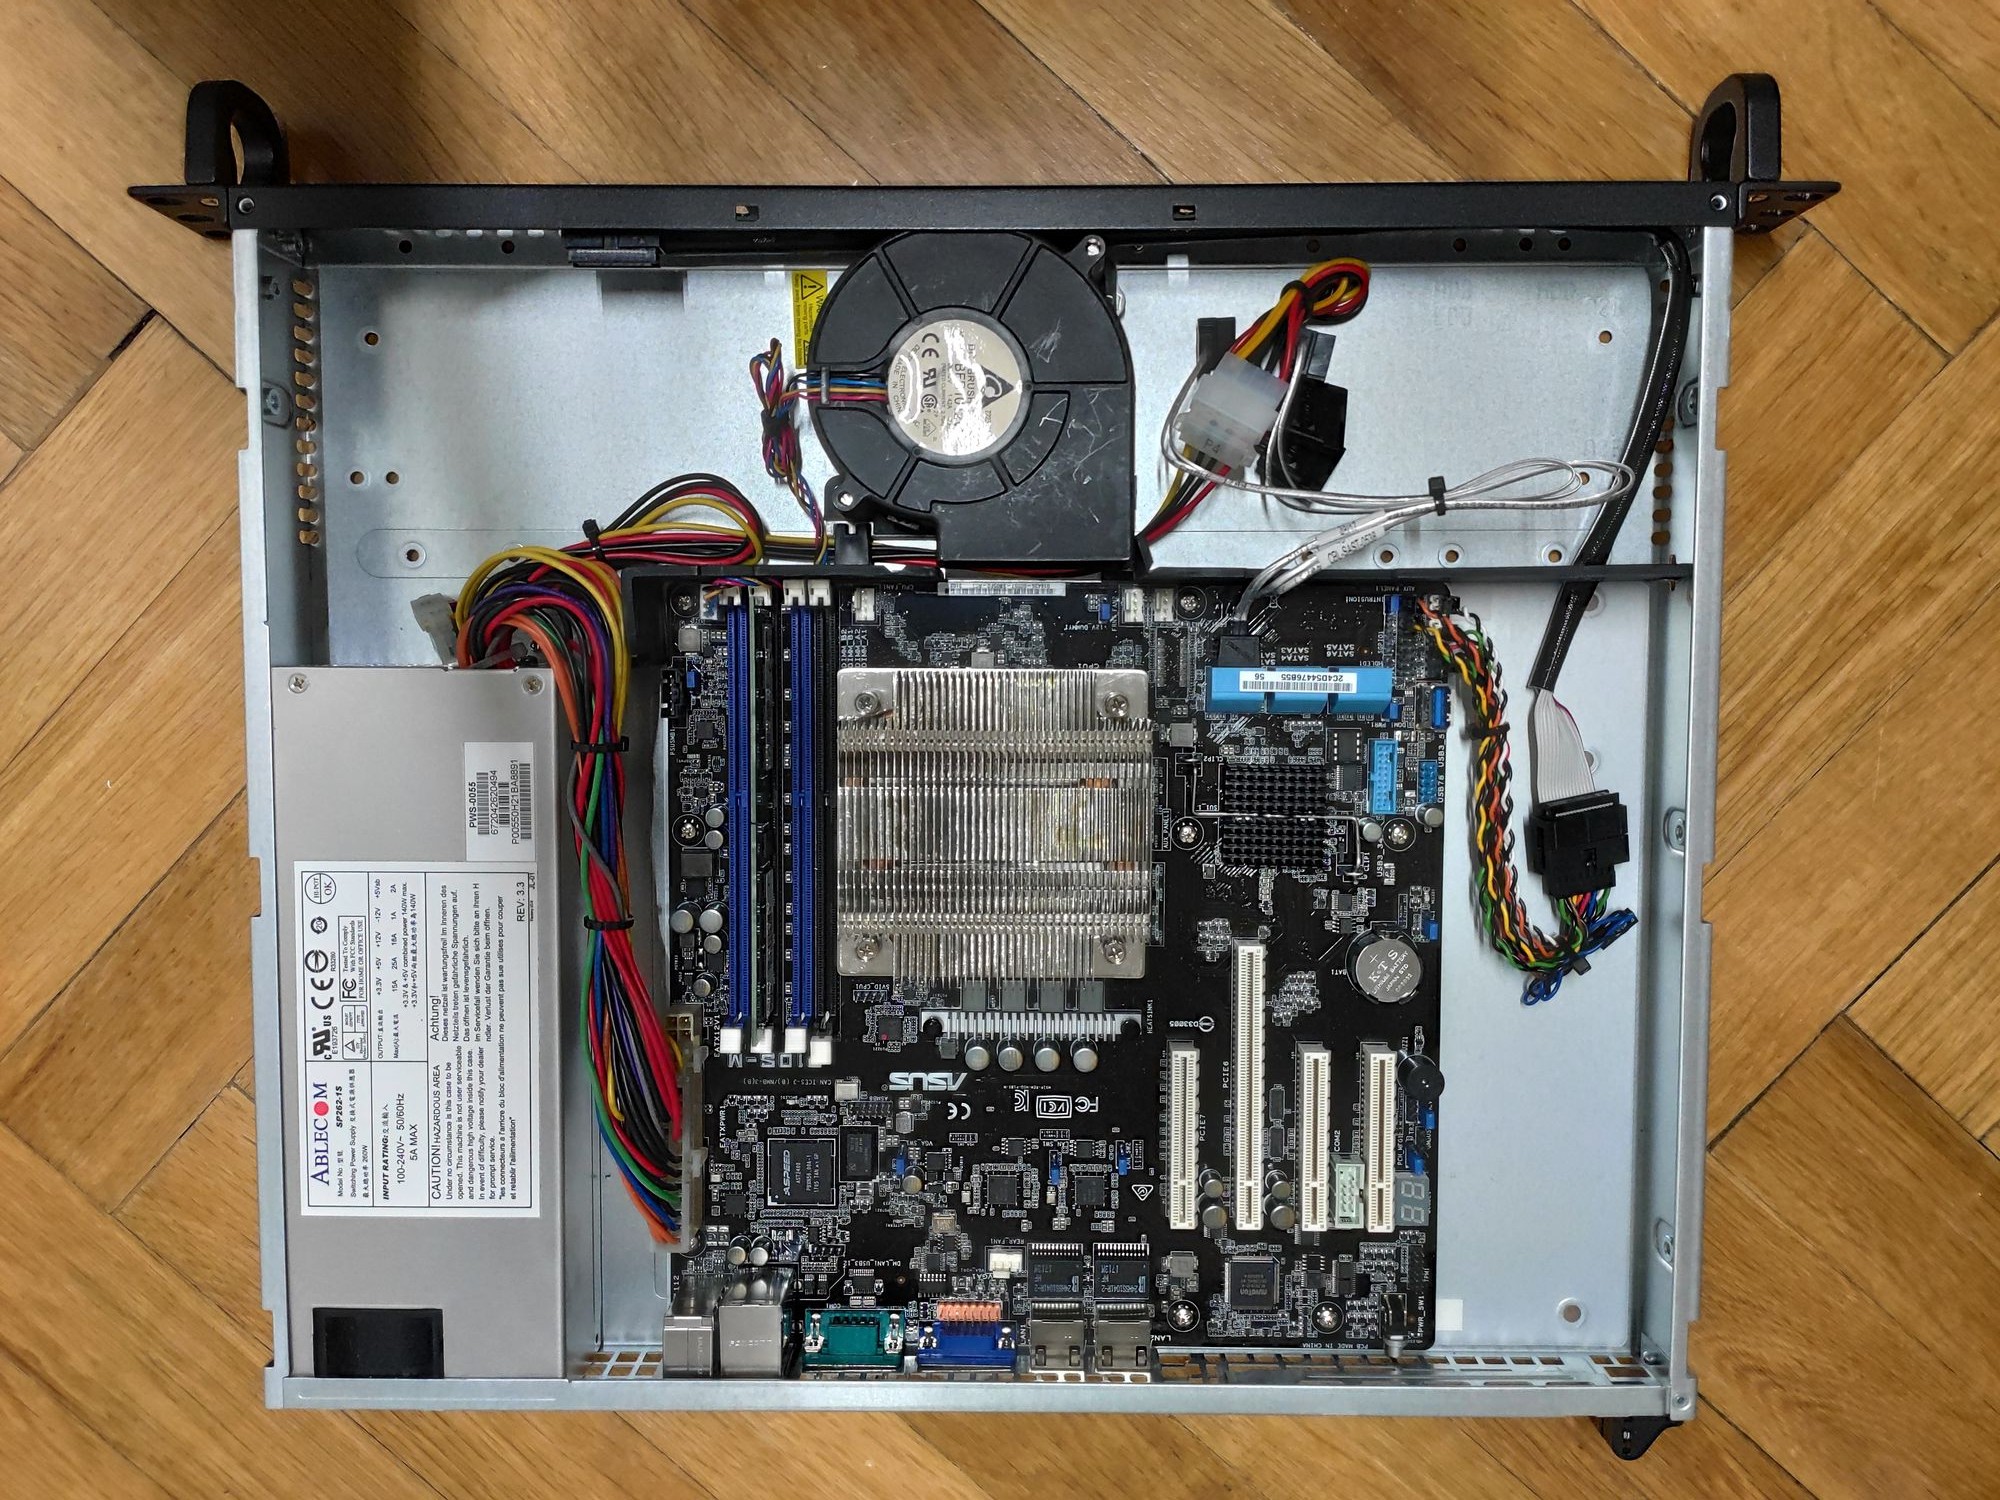
As we can see on the first picture, one 97x94x33mm centrifugal blower fan is used to cool CPU and motherboard. It is rated at an airflow of 37.97 CFM, has 1.952 in H2O of static pressure and the noise is rated at 60 dBA. This is obviously too loud for a quiet office setting.
To cool the PSU a standard 40 mm fan was installed, which is also loud. All the fans are being replaced with the aforementioned Noctua fans.
The server came with two airflow shrouds that we will have to replace to accommodated the smaller 40 mm fans.
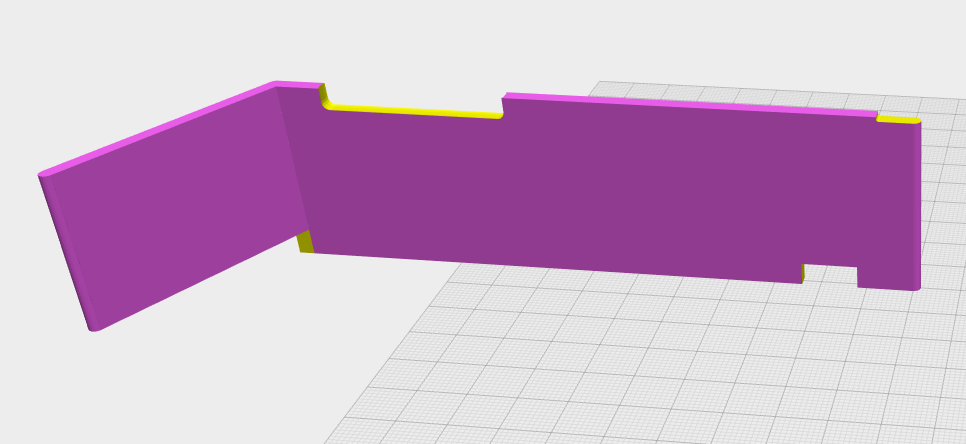
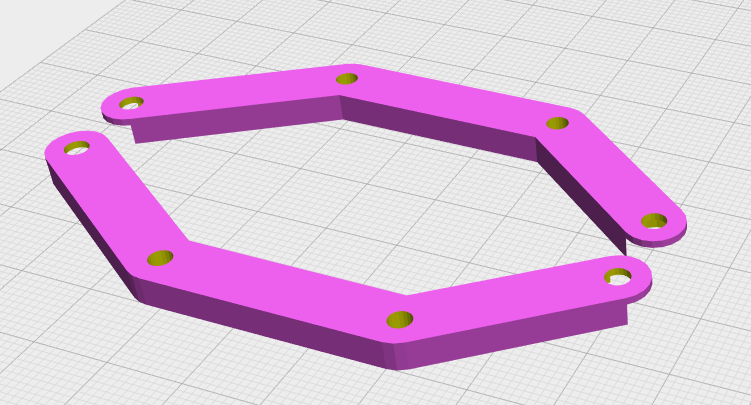
Shrouds and 3D Printing
The new shroud was designed in openjscad. Since there was only one drive cage in the server, new mounting plates needed to be designed. The mounting plates are compatible with all 2.5 inch drives or SSDs.
Last but not least mounts for the fans were needed, one mount for the four fans which cool the CPU and one mount for the external fan of the PSU.
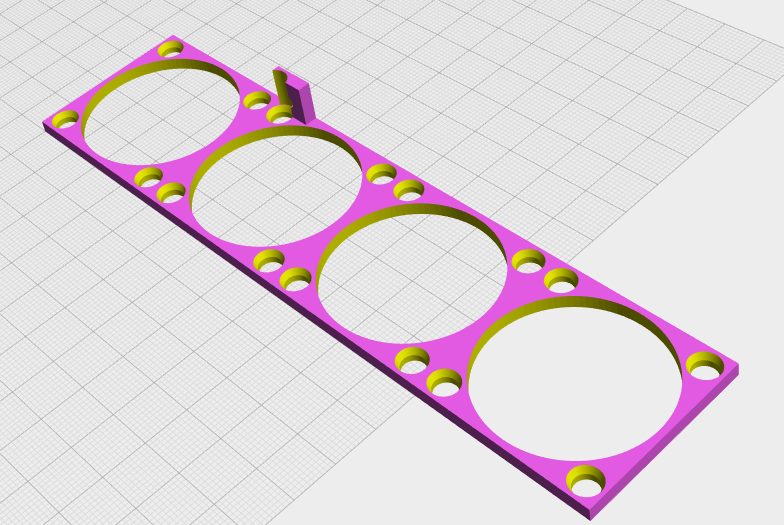
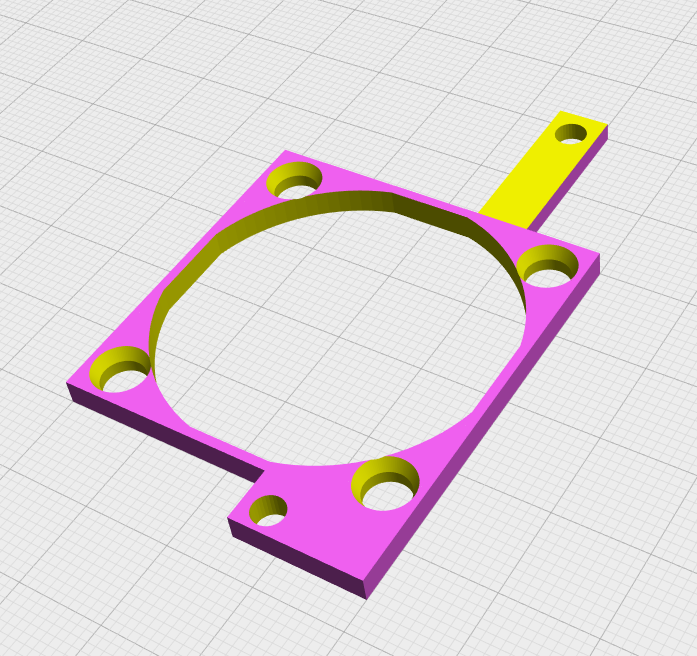
The code for all models is available on my Github page. For stacking the drives the design of nonaym was chosen. All the parts were printed on an Ender 3 Pro.
Assembly
First we add the new RAM and the M.2 drives to the motherboard. After that we need to mount the fan to the power supply. Since we are working on a 230V component be careful and take the usual steps when working on components like the PSU e.g. unplugging it and waiting a couple minutes so the capacitors are discharged.
First take the PSU out of the housing. In this case there is one screw on the bottom and two screws on the side next to the fan. Next, open up the PSU. With the Ablecom SP-262-1S, all the screws including the fan screws have to be removed to open it up. (This will most probably void your warranty). Either remove the fan with the cable or cut the cable of the old fan and solder the new fan to the old cable. If soldering is chosen, heat shrink the cable afterwards so it is better protected. After that, neatly store all the cables in the PSU and close it up.
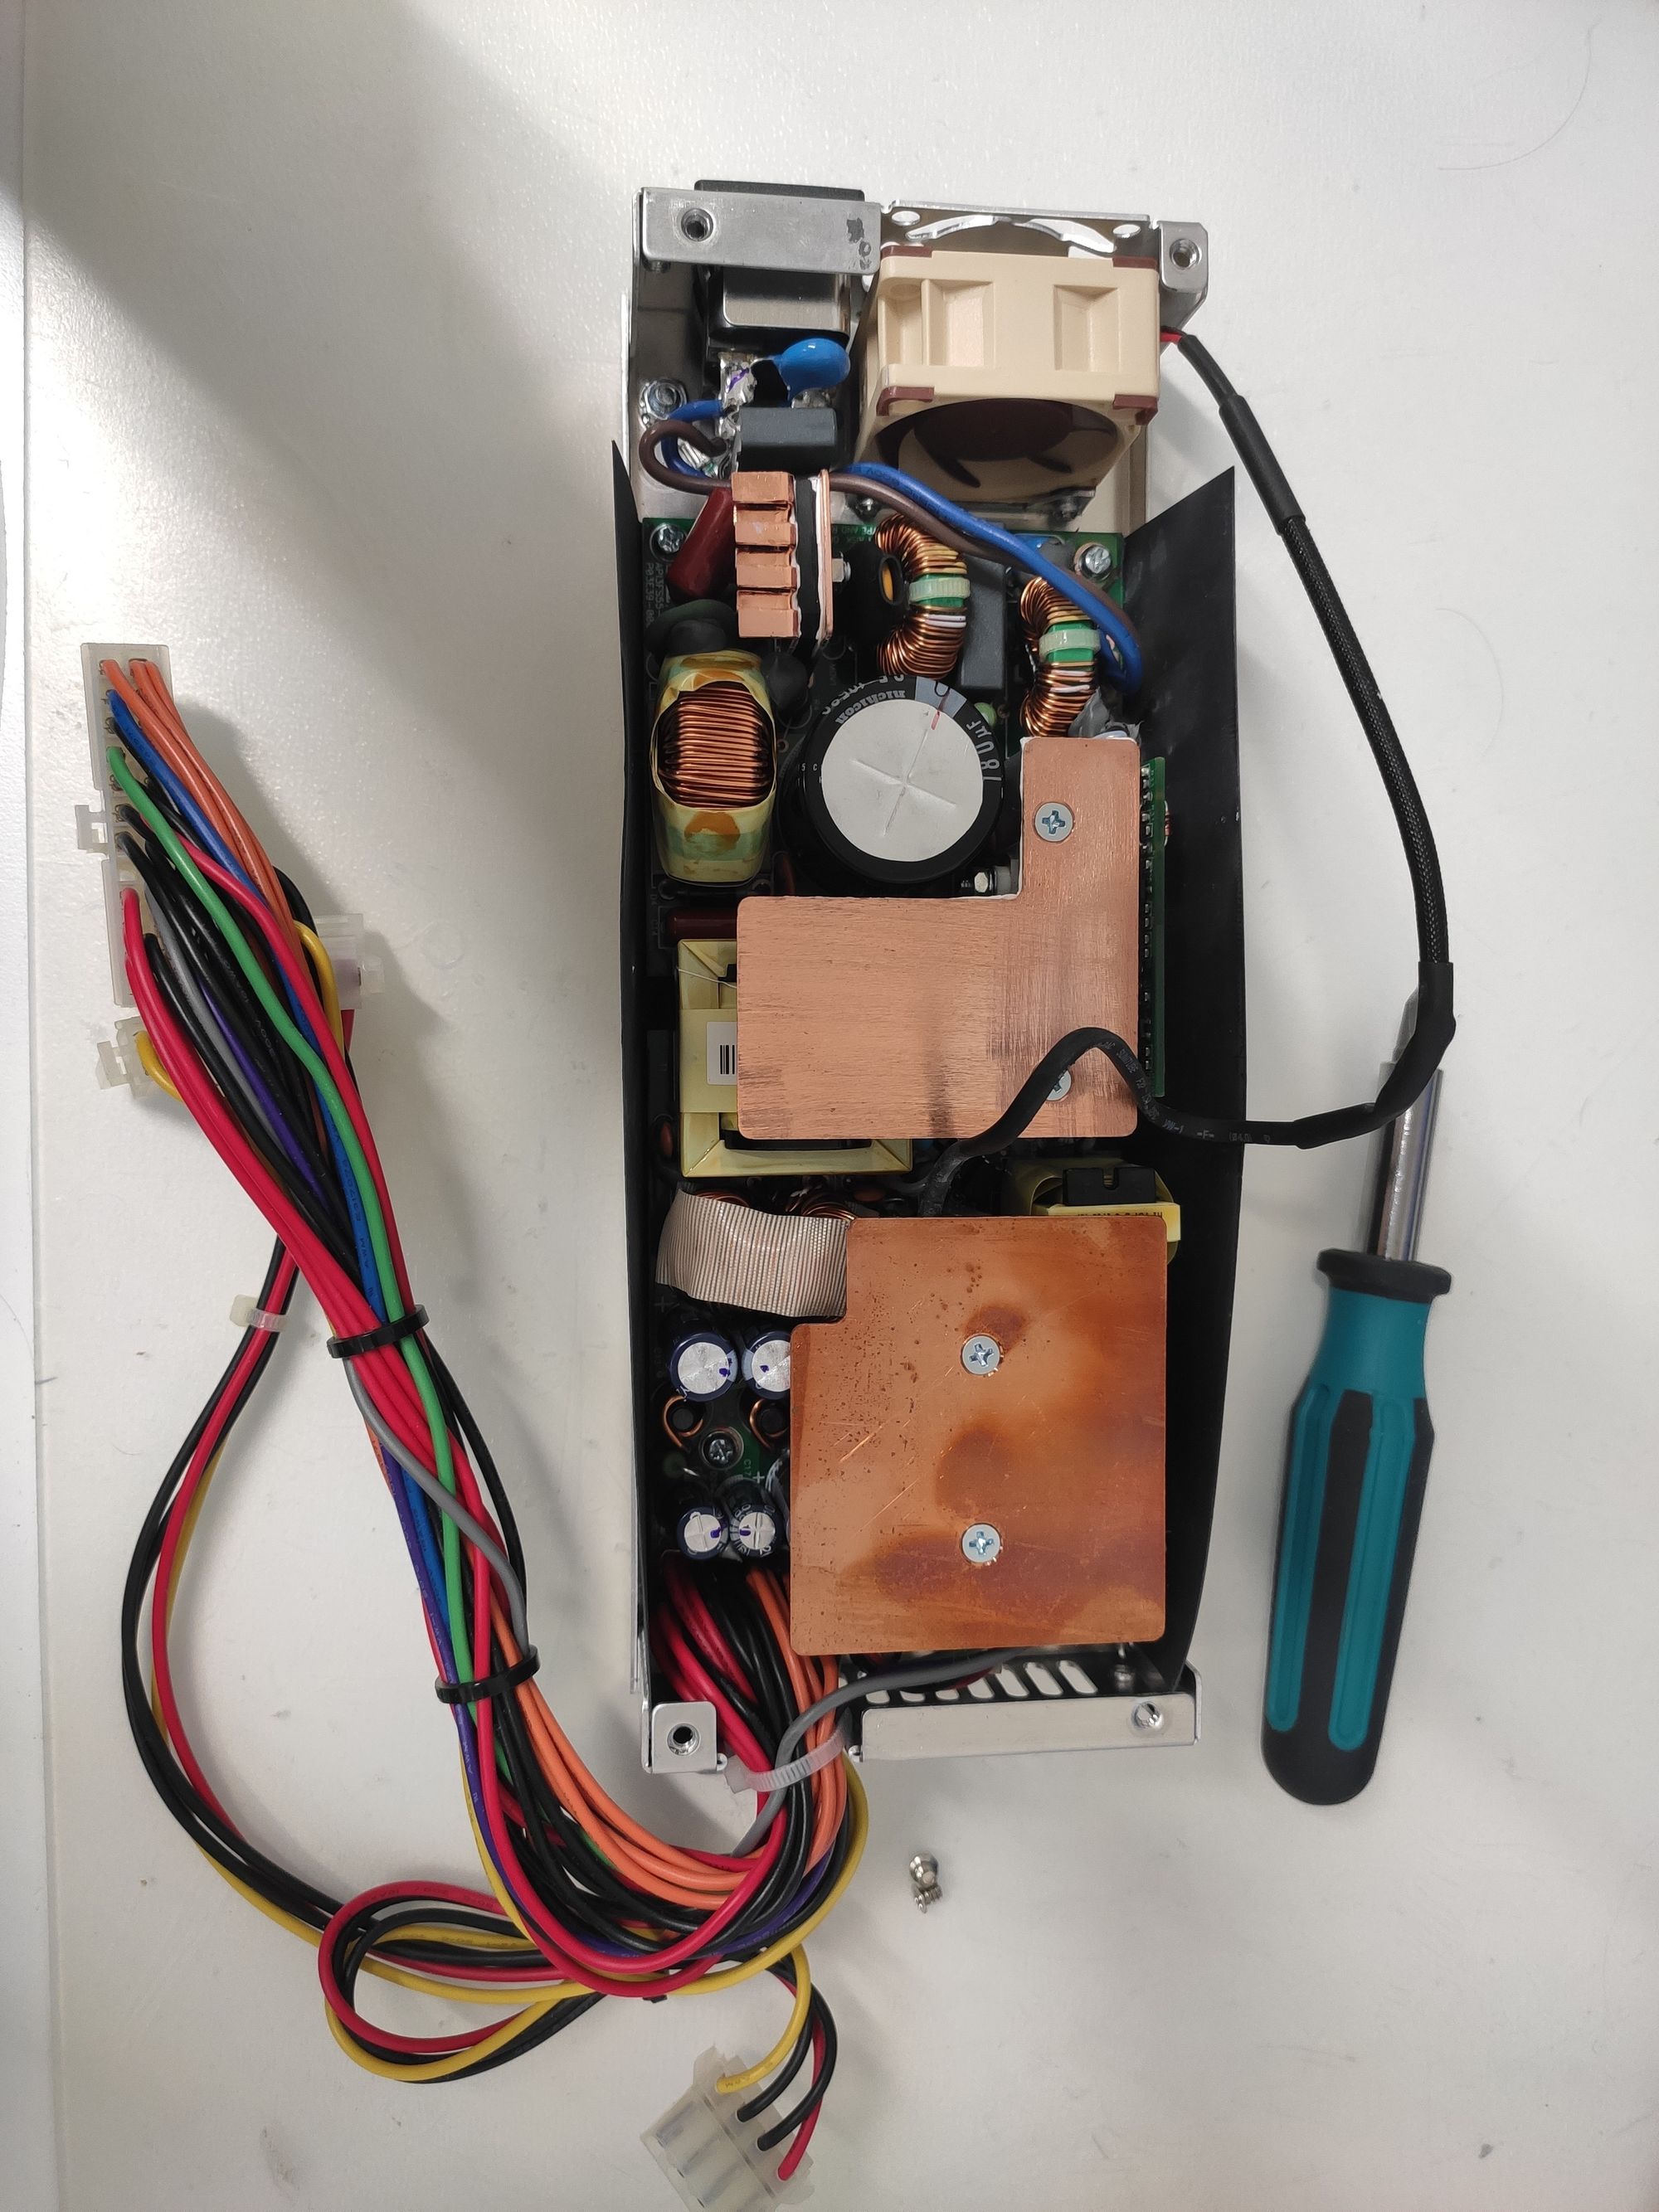
Before putting the PSU back into the case mount the outer PSU fan. Then but everything back to together. Mount the SSDs on the brackets and the FANs on the mounting bracket and mount both in the case.

Below you can find the bill of materials:
BOM
Tools:
- 3D Printer (Ender 3 Pro)
- Glass Printing Bed (not mandatory but used)
- PLA or PETG fillament
- iFixit Pro Tech Toolkit or similar
- Side cutters
- Utility knife
- Caliper (for designing 3D printed parts for own size adjustments)
- Soldering Iron (TS80 recommended)
- Lighter or hot air gun
Material:
- Supermicro Server
- couple of heat shrink tubes
- couple of zip ties
- 2x Kingston 16 GB DDR4
- 1x PCIe x4 to M.2 adaptar card
- 1x angled PCIe riser card
- 1x M.2 SATA SSD
- 1x M.2 NVME SSD
- 4x 2TB SSDs
- 5x NF-A4x20PWM
- 1x NF-A4x20 FLX
- 2x MOLEX to 2x SATA
- 3x Thin SATA cables (5x in total)
- 24x 3M screws (for mounting the SSDs)
- 1x Phillips hex washer 6-32 UNC screw (fan mount PSU)
- 9x flat 6-32 UNC screws
Final Notes: All aliexpress links are affiliate links. I promote only products that I genuinely believe in and use in my projects. This is by no means a complete guide and I do not take any responsibilities for accidents or damages caused by following this blog post.